

Off Grid
Bokashi Composting: Is It Right for You?

Bokashi composting. Ever heard of it?
It’s a unique type of composting that is easy to do, highly beneficial, and ideal for small spaces. And it’s perfect for homesteaders.
Keep reading for an overview of bokashi composting and how it may benefit your homestead.
What Is Bokashi Composting?
The term bokashi is Japanese and means “fermented organic matter,” as well as “fading away.”
According to The Spruce, “Developed in the early 1980s by Dr. Teuro Higa, a professor at the University of Ryukyus, Okinawa, Japan, the method involves layering kitchen scraps (vegetables and fruits, as well as meat and dairy scraps) with a Bokashi inoculant in a special bucket. Usually, the inoculant consists of either wheat germ, wheat bran, or sawdust combined with molasses and effective microorganisms (EM).”
The bokashi bucket is essentially an airtight bucket with a tight lid and a spigot on the bottom that is used to release the drained-off liquid (sometimes called bokashi tea).
Unlike traditional composting, bokashi is more fermenting than composting.
However, this faster fermentation process means you can bury it sooner, which then results in decomposition.
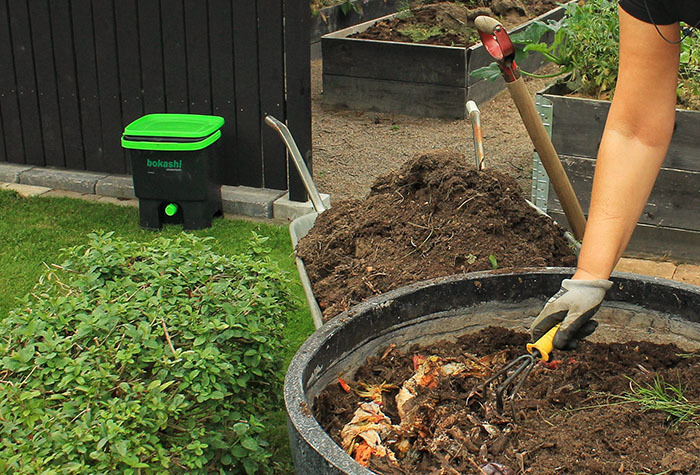
What Are the Benefits of Bokashi Composting?
There are several benefits of bokashi composting – even more than traditional composting.
- Faster – Bokashi composting takes significantly less time to break down than traditional composting (within 10 days compared to several months).
- Less odor – Since waste isn’t exposed to oxygen, it doesn’t smell like traditional composting.
- Works with more types of waste – Traditional composting typically doesn’t allow you to toss meat or dairy products in the compost bin, but you can toss meat, dairy, bones, and all types of edible leftovers into the bokashi bucket.
- No pests – The airtight bokashi bucket means there is no risk of pests.
- Smaller footprint – With bokashi composting, you only keep the small bucket inside and then bury the remains outdoors. It does not require a compost pile.
- Nutrient Value – According to The Spruce, “The nutrient value of the [bokashi compost] material is among the highest of any method of composting.”
How Do You Use Bokashi Tea?
It’s not just the bokashi compost that is beneficial. The liquid that drains from the bokashi compost is also useful.
The Arizona Department of Environmental Quality explains, “The fermenting process also creates a leachate of beneficial bacteria that can be poured down the drain to prevent blockages, used to prevent algae, or diluted to use as fertilizer.”
Keep a container or pitcher near your bokashi bucket for the purpose of collecting this beneficial tea.
Bokashi Composting Steps
Bokashi composting is a remarkably simple process. Anyone can do it!
Here are the steps involved (adapted from MasterClass).
1. Obtain materials. Bokashi composting requires a bokashi bucket, which is an airtight bucket that has a drainage spout. You will also need bokashi bran. The bran is fermented organic material, such as wheat germ, wheat bran, or sawdust combined with molasses and microorganisms. The bran is critical because it contains the microbes necessary for breaking down waste.
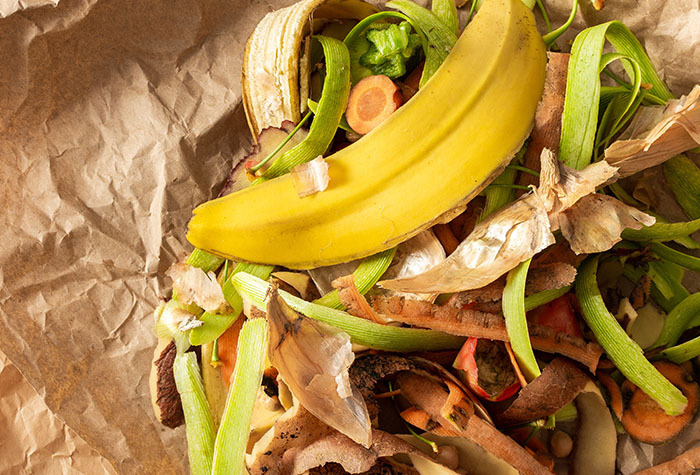
2. Add scraps to the bucket. Add kitchen scraps to your bucket. It doesn’t matter if it’s fruit, vegetables, coffee grounds, egg shells, meat, or cheese. Unlike other types of composting, bokashi composting accepts all organic material. For instance, other organic materials like grass clippings, sawdust, or dead leaves can also be added.
3. Add bokashi bran and squish down. Every time you add kitchen waste to the bucket, sprinkle the waste with a layer of the bokashi bran and press them down firmly. Many people place a plate inside their bucket for this purpose. Pressing will help push the air out of the matter and create the best anaerobic environment. After adding the bran and pressing it down, replace the lid. Make sure you store the bucket outside of direct sunlight.
4. Continue adding food scraps until the bucket is full. Repeat the process. Every time you add food scraps, continue layering with more bokashi bran, and press the pile down.
5. Drain liquid off. The fermentation process produces excess liquid (aka bokashi tea) that can hamper the beneficial bacteria. Every other day, use the spigot to drain off excess liquid. Collect the bokashi tea – when diluted, it works as fertilizer for houseplants.
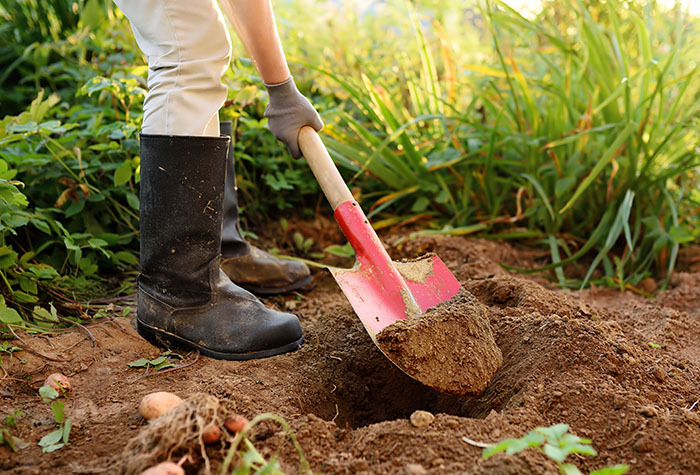
6. After two weeks, bury it in a fallow spot in your garden. After two weeks, the matter should be properly fermented—it should feel soft and smell slightly sour. In this state, it is still too acidic for plant roots; it needs a little extra time to go through the true composting process. Don’t just toss it in your garden. You must bury the fermented food waste in a bare spot of your garden to allow it to decompose or add it to your composting bins or worm bin.
7. Add to your garden soil. Within two weeks of beginning to compost, your fermented bokashi compost should be ready to feed plants. If you buried it in your garden, simply plant over the top of it. If you added it to your compost pile, mix it in to your garden bed.
Note – In addition to DIY bokashi composting, you can also buy bokashi composting kits or just bokashi bran. This makes it even easier and quicker.
[Related Read: Composting Made Easy: Tips for the Homestead]
Who Should Consider Bokashi Composting?
Bokashi composting is good for any gardener.
Bokashi composting is great for creating healthy soil, which is key to a successful harvest.
In particular, it is a great choice for those in small homes or apartments.
Additionally, it is a healthy choice for those who are environmentally conscious.
Source link: https://survivaljack.com/2023/07/bokashi-composting-is-it-right-for-you/ by Survival Jane at survivaljack.com
Emergency
The Grid-Down Nightmare: One Strike from the Sky Could End America As We Know It

North Korea’s Quiet Threat Isn’t Nukes on Cities… It’s Nukes in Orbit
Kim Jong Un doesn’t need to hit Manhattan or Los Angeles to cripple America. He just needs one small nuclear warhead detonated 200 miles above the heartland. No fireball. No mushroom cloud. Just a burst of invisible energy (an EMP) that fries every unshielded circuit in the continental U.S. Former Congressional EMP Commission Director Dr. Peter Pry issued stark warnings before his death in 2022: North Korea’s test launches of high-altitude ballistic missiles were not accidents… they were dry runs for an electromagnetic strike. And he wasn’t alone. DHS and DOD jointly confirmed: “EMP events have the potential to permanently damage electrical components and entire systems within most critical infrastructure sectors.”The Real Apocalypse Isn’t a Bomb—It’s the Blackout That Follows

Rogue States and Nonstate Actors Are Watching… and Waiting
North Korea is the headliner, but they’re not the only threat.- Iran has launched satellites capable of reaching EMP altitude.
- Russia has maintained and modernized electromagnetic pulse weapons as part of its strategic arsenal.
- Nonstate actors, including terrorist organizations, could hijack or detonate a stolen warhead using commercial satellite launch tech.
- Even solar storms, like the Carrington Event of 1859, could mimic the effects of an electromagnetic pulse on a global scale, and we’re overdue for one.
The Government Knows. But You’re Still On Your Own.
In 2020, then-President Trump issued an executive order prioritizing EMP preparedness, directing the Department of Homeland Security and Department of Defense to study the threat. He later promised to build a U.S. version of Israel’s “Iron Dome” to protect the homeland from high-altitude missile attacks. That was years ago. What’s happened since? Nothing. The grid remains exposed. Emergency systems are still vulnerable. Most Americans remain completely unaware that their entire way of life could end in milliseconds. Even DHS admits: EMP shielding for civilian infrastructure is “too expensive and impractical”—translation: you’re on your own.When the Lights Go Out… All Hell Breaks Loose

- Grocery stores are looted.
- ATMs and banks are useless.
- People begin turning on one another for fuel, food, and water.
- Urban riots erupt. Rural areas isolate and arm up.
- Water stops flowing.
- Sanitation systems fail.
- Diabetics can’t refrigerate insulin. Infants can’t get formula.
- Your neighbors – once friendly – start getting desperate.
A Perfect Kill Shot – And America Has No Defense
It doesn’t take a superpower. It just takes a satellite – or even a balloon – with the right payload. The Chinese spy balloon that floated over U.S. airspace in early 2023? That was a proof of concept. Now imagine that balloon carrying a small nuke. Detonated at high altitude, it wouldn’t destroy a city—it would kill the grid across half the country. And unlike conventional war, you don’t get a second chance. There is no recovery window. Once the lights go out, they may never come back on.The Time to Prepare Is Yesterday
This isn’t about paranoia. It’s about realism. Experts have said it. The government has confirmed it. Rogue states have rehearsed it. The next attack on America won’t be on a city. It’ll be on our infrastructure. If that day comes, the only question left is: Are you ready to survive in a world that just got sent back to the 1800s? When the lights go out – whether from an electromagnetic pulse, cyberattack, or natural disaster – your lifeline to the outside world could be gone in an instant.
Emergency
When Disaster Strikes: Your Ultimate Survival Guide

Disasters don’t send a warning. They can happen anytime, anywhere, leaving us scrambling to figure out what to do. Whether it’s a sudden storm, an earthquake, or getting lost in the wild, the key to survival is simple: be prepared. That’s where our FREE book “When Disaster Strikes” comes in.
This guide isn’t just for adventurers or experts—it’s for everyone. No matter where you live or your experience level, this book teaches you the skills and mindset you need to protect yourself and your family during an emergency.
Let’s take a closer look at what makes “When Disaster Strikes” a must-read for anyone who wants to stay safe when the unexpected happens.
Why Mindset Matters Most
The first lesson in the book is clear: survival isn’t just about skills and gear. It’s about your mindset. Staying calm and focused can mean the difference between making smart choices and putting yourself in danger.
In stressful situations, fear and panic can take over. “When Disaster Strikes” explains how to overcome these feelings by staying positive and breaking problems into smaller steps. It teaches you how to stay hopeful, even when things feel overwhelming.
The “SURVIVAL” Acronym

A big part of the book is the SURVIVAL acronym, which breaks down the key steps to staying safe. Here’s what it stands for:
- S – Size Up the Situation: Look around, check your surroundings, and stay alert. Know what’s happening and plan your next move carefully.
- U – Use All Your Senses: Think before you act. Rushing into a decision can waste energy or make things worse.
- R – Remember Where You Are: Pay attention to landmarks, use maps, and keep track of your location.
- V – Vanquish Panic and Fear: Stay calm and focus on solutions, not problems.
- I – Improvise: Use the resources around you to solve problems creatively.
- V – Value Your Life: Stay determined. Remember, the will to survive is your greatest tool.
- A – Act Like the Natives: Learn from animals or local people about where to find food, water, or shelter.
- L – Live by Your Wits, Learn Essential Skills: Practice survival skills now so you’ll be ready when you need them.
Essential Survival Skills

“When Disaster Strikes” is full of easy-to-follow tips for building your survival skills. Here are a few highlights:
Finding Water
Water is your top priority in any emergency. The book explains how to find natural water sources like rivers or rainwater. It also teaches you simple ways to purify water, such as boiling or using a filter.
The Essentials Tools for Survival: What You Need to Know

Building Shelter
Shelter protects you from the weather and keeps you safe. The book shows you how to build simple shelters using what’s around you—like a tarp, branches, or even snow.
Starting a Fire

Fire isn’t just for warmth. It’s useful for cooking, purifying water, and even signaling for help. You’ll learn how to start a fire with tools like matches, lighters, or even sticks and stones.
Food in the Wild

When food is scarce, knowing what’s safe to eat is critical. “When Disaster Strikes” covers:
- Edible Plants: How to identify plants that are safe to eat.
- Catching Fish: Tips for fishing with simple tools like spears or nets.
- Insects as Food: Why bugs can be a great source of protein (and how to make them more appetizing).
The book also warns about poisonous plants and shows you how to avoid them.
Signaling for Help
Sometimes, the fastest way to survive is to get rescued. “When Disaster Strikes” teaches you how to:
- Build signal fires that can be seen from far away.
- Use mirrors or flashlights to reflect sunlight and catch attention.
- Spell out SOS using rocks, logs, or anything visible from the sky.
First Aid Basics
Injuries can happen in any survival situation. Knowing basic first aid is crucial. The book provides step-by-step advice for treating common problems like cuts, sprains, or even frostbite. It also emphasizes the importance of staying calm and acting quickly.
Why You Should Read “When Disaster Strikes”

Survival isn’t just about gear or gadgets. It’s about knowledge and confidence. “When Disaster Strikes” gives you the tools you need to face emergencies with a clear head and a solid plan. The book isn’t just for wilderness survival—it’s for anyone who wants to be ready for life’s unexpected challenges.
Whether you’re a beginner or someone looking to sharpen your skills, this guide has something for you. The advice is practical, the tips are easy to follow, and the tone is encouraging.
Start Preparing Today
Emergencies don’t wait for you to be ready. Take control now by downloading your free copy of “When Disaster Strikes” from FamilySurvival. Learn how to protect yourself and your family, no matter what challenges come your way.
👉 [Subscribe and Get Your Free Copy of When Disaster Strikes Here] 👈
Preparedness starts with knowledge. Are you ready to take the first step?
Off Grid
Building a Wind-Powered Water Pump for Efficient Irrigation

Embracing renewable energy on the homestead, particularly wind power, can revolutionize your irrigation system.
This comprehensive guide will walk you through designing a wind-powered water pump, a sustainable solution for your irrigation needs. By harnessing the wind, you can efficiently water your crops, reduce energy costs, and contribute to environmental conservation.

The Basics of Wind-Powered Irrigation
Understanding how a wind-powered water pump works is the first step. Unlike electric pumps, these systems use the mechanical energy generated by wind turning the blades of a windmill. This motion drives a pump—usually a reciprocating piston pump—to draw water from a source like a well or pond and direct it to your irrigation system.
Choosing the Right Location:
- Wind Assessment: Use an anemometer to measure wind speed over a period to ensure the location gets consistent wind.
- Elevation: Higher elevations typically receive more wind. A clear, unobstructed area is crucial for maximum wind exposure.
- Proximity: The closer your windmill is to the water source, the more efficient the water pumping will be.
- Accessibility: Ensure the site is accessible for maintenance and repairs.
Related Read: 18 Energy-Saving Hacks for the Homestead
Selecting the Windmill:
- Size Considerations: Larger windmills can pump more water, but require stronger winds. Assess your daily water needs for livestock, irrigation, and other tasks to determine the best size.
- Type of Windmill: American-style, multi-blade windmills are ideal for low-to-moderate wind speeds. Plus, they are durable. For higher wind areas, consider a wind turbine-style windmill.
- Material: Look for corrosion-resistant materials, especially if you live in a humid or salty environment.
Pump Selection:
- Matching Pump to Windmill: The pump’s capacity should align with your windmill’s power output. A larger windmill can support a pump with a higher water output.
- Pump Type: Reciprocating piston pumps are common and effective for various depths. For deeper wells, consider a deep-well piston pump.
- Suction Capacity: Ensure the pump can effectively draw water from your source. The maximum suction lift for most surface pumps is about 25 feet.
Learn more about water management in our guide on Homestead Water Systems.

Constructing the Wind-Powered Water Pump
Building the Tower:
- Height: The tower should be tall enough to ensure the windmill clears nearby obstructions by at least 15 feet.
- Materials: Use galvanized steel or treated wood for durability. The structure must be strong enough to support the windmill’s weight and withstand wind forces.
- Foundation: A solid foundation is crucial. Concrete is commonly used to anchor the tower securely.
Installing the Windmill:
- Assembly: Follow the manufacturer’s instructions for assembling the windmill on the ground.
- Hoisting: Use a crane or pulley system to lift the windmill onto the tower. This is often a two-person job.
- Orientation: The windmill should freely rotate to face the wind. Check that all moving parts are well-lubricated and move smoothly.
Connecting the Pump:
- Mechanical Connection: Connect the windmill to the pump using a rod or shaft. This transfers the rotational energy to the pump.
- Piping: Install pipes from the pump to your water source and to the irrigation system. Use durable, weather-resistant piping.
Setting Up the Irrigation System:
- System Type: Choose between drip irrigation, sprinklers, or soaker hoses based on your crop needs.
- Layout: Design the irrigation layout for even water distribution. Consider the topography of your land.
- Connection: Connect the output pipe from the pump to your irrigation system. Include a shut-off valve for control.

Maximizing Efficiency and Sustainability
Regular Maintenance:
- Inspection Schedule: Conduct regular inspections of the windmill, tower, and pump. Look for rust, wear, and loose components.
- Lubrication: Regularly lubricate all moving parts to ensure smooth operation.
- Repairs: Address any issues immediately to prevent further damage.
Water Storage Solutions:
- Storage Tank: Install a water storage tank to collect excess water. This ensures a continuous water supply during low wind periods.
- Placement: Place the tank at a higher elevation, if possible, for gravity-fed irrigation.
Check out this guide on choosing water storage tanks.
Smart Irrigation Practices:
- Water Conservation: Use mulching and soil moisture sensors to reduce water waste.
- Timing: Irrigate during cooler parts of the day to minimize evaporation.
- Monitoring: Regularly check the system for leaks or blockages.
Related Read: Gravity Fed Irrigation for Your Garden
Source link: https://survivaljack.com/2024/03/wind-powered-water-pump-irrigation/ by Survival Jack at survivaljack.com


Survival 101: Building Your First Emergency Kit

How to Pack a Bug Out Bag List That Could Save Your Life

Urban Survival Tactics for 2025: What Preppers Need to Know About Civil Unrest and AI Surveillance

The One-Day Prepper Pantry: Build a 30-Day Food Plan in One Afternoon
